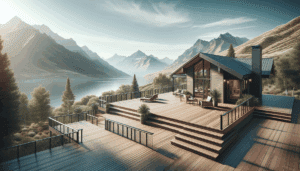
Thinking about building your own deck? Good call. A well-built deck turns your yard into a hangout spot, a quiet coffee nook, or the best seat in the house for Timpanogos sunsets. If you’re a homeowner in Orem or anywhere in Utah County, this beginner-friendly guide walks you through the real steps, local rules, smart materials, and the kind of small tips that keep problems from snowballing later. We’re Utah County Decks, and while we build custom decks for a living, we also love helping DIYers get it right—because nothing beats the feeling of stepping onto a deck you built with your own hands.
Table of Contents
- Should You DIY This Deck? A quick gut check
- Permits, codes, and Utah County realities
- Plan like a pro (without losing your weekend)
- Materials that survive Utah weather
- Tools you’ll actually use (and a couple you’ll love)
- Step-by-step: from stakes to first barbecue
- Common beginner mistakes (and how to dodge them)
- What will it cost in Orem—and how long will it take?
- Seasonal tips for Utah County builds
- Safety and inspections: worth every minute
- When to call a pro (and still feel like you built it)
- The local edge: small details we’ve learned building in Orem
- Ready to build—with a little backup?
Should You DIY This Deck? A quick gut check
Here’s the thing: lots of first-time builders can tackle a simple, low deck. A big, second-story deck with stairs, lighting, and a hot tub? That’s another story. You don’t need to be a carpenter, but you do need patience, a decent tool set, and a willingness to measure and re-measure—then measure again.
Ask yourself a few honest questions:
- Size and height. A ground-hugging platform is a great first project. Taller decks add engineering, bracing, and more code checks.
- Time and weather. In Orem, spring and fall are sweet spots. Summer heat is real; winter is tough on concrete and fingers.
- Structure and safety. If it’s attached to your house, carries heavy loads, or sits on a slope, you’ll need stronger planning—and likely a permit.
You know what? There’s no shame in a hybrid approach: you handle the demo and Decking; a pro handles footings, ledger, and stairs. It’s common, and it works.
Permits, codes, and Utah County realities
Orem follows the International Residential Code with local adjustments. Most attached decks, decks over 200 square feet, or decks over 30 inches above grade will need a permit. Always confirm with Orem’s Building Services before you start. It’s simpler than you think, and inspectors are extremely helpful.
Local points that matter:
- Frost depth. Footings need to extend below frost—plan for about 30 inches or more. Shallow footings are a common failure point.
- Snow and live loads. Decks are typically designed for a 40 psf live load, plus dead load. Snow drift can add to what your deck “feels.” Build stout.
- Ledger attachment. If you attach to the house, fasten the ledger to the rim joist with structural screws or bolts, not lag screws into sheathing. Add flashing that tucks under the siding.
- Guards and stairs. Guards are usually 36 inches high. Stair risers up to 7 3/4 inches, treads 10 inches minimum, consistent all the way down.
If this sounds dry, it’s because this is the part that keeps you safe. A great deck looks nice; a code-compliant deck lasts.
Plan like a pro (without losing your weekend)
There’s a little art here. Look at how your yard moves. Where does the afternoon sun land? Where do your neighbors’ windows point? How will you carry a grill to the deck without a maze of stairs?
Sketch a simple plan. Mark your house door, steps, rail posts, and where furniture sits. Add blocking now for future features like Railing posts, a pergola, or a privacy screen. Then call Blue Stakes of Utah 811 before you dig—free utility locating saves expensive headaches.
One more thing that locals know: wind sneaks down the canyon. Think about a corner that needs a wind screen or taller railing for comfort.
Materials that survive Utah weather
Orem gets blazing sun, dry air, and freeze-thaw cycles. Choose materials rated for exterior use here, not just “anywhere.” Here’s a quick comparison:
| Material | Pros | Considerations |
|---|---|---|
| Pressure-treated lumber | Affordable, strong, easy to source at Orem suppliers | Needs sealing or stain; verify compatibility with fasteners |
| Cedar | Beautiful color, lighter weight, naturally rot resistant | More maintenance; softer—can dent |
| Composite (Trex, TimberTech, Fiberon) | Low maintenance, colorfast, clean underfoot | Higher upfront cost; expansion gaps matter in Utah’s temperature swings |
Hardware and fasteners matter just as much. Use ACQ-rated hot-dipped galvanized or stainless steel connectors and screws. Brands like Simpson Strong‑Tie for brackets and hangers, and GRK or SPAX for structural screws, keep your deck tight for years. If you choose composite, match the manufacturer’s hidden fasteners and spacing requirements. Utah’s sun is strong—cheap fasteners don’t last long here.
Tools you’ll actually use (and a couple you’ll love)
You don’t need a cabinet shop, but good tools make this project smoother. Rent or borrow what you don’t have.
- Cutting and fastening. Circular saw, miter saw, impact driver, drill, jigsaw for notches.
- Layout and leveling. Tape, speed square, chalk line, laser level or line level, string and stakes.
- Digging and concrete. Post hole digger or a two-man auger rental (Home Depot in Orem has these), mixing tub, shovel.
- Clamps and safety. 24–36 inch clamps, eye and ear protection, work gloves, dust mask.
Pro tip: a long, straight board or an aluminum deck board straightener is a lifesaver when boards misbehave.
Step-by-step: from stakes to first barbecue
1. Layout and square
Stake the corners. Run string lines to define the edges. Use the 3‑4‑5 triangle method (or 6‑8‑10, bigger is easier) to square the layout. Paint your footing Locations on the grass. Slow here is fast later.
2. Footings
Dig below frost depth. Widen the bottom if soil is soft. Drop in tubes, set rebar if required, and pour concrete. Set post bases level with finished concrete, aligned with your string lines. Let it cure. If you need an inspection now, schedule it.
3. Ledger (if attached)
Remove siding at the ledger location, never screw through siding. Install a continuous ledger with structural screws into the rim joist. Use proper spacers or standoffs, and install metal flashing tucked under the house wrap and over the ledger. Avoid attaching to brick veneer—use a free-standing deck if that’s your exterior.
4. Beams and posts
Set your 6×6 posts in the bases, cut them to height, then build beams from doubled or tripled lumber per span charts. Use Simpson Strong‑Tie brackets and through-bolts where required. Check for crown on boards and keep all crowns up; consistency keeps the surface flat.
5. Joists and blocking
Hang joists at 16 inches on center for most decking; many composites need 12 inches when installed on a diagonal. Install joist hangers, add solid blocking at mid-span if required, and extra blocking under rail posts and stair stringers. This is where decks are won or lost.
6. Decking
Start straight against the house or a reference line, then work out. Gap boards for drainage. With composite, follow the manufacturer’s spacing for temperature—Utah’s big swings from July to January matter. Use hidden fasteners or color-matched screws. Snap chalk lines so screws look tidy.
7. Railings and stairs
Post connections must be stout—through-bolted to framing with approved hardware. Guard height: usually 36 inches. Stair stringers cut clean, treads consistent. Add a graspable handrail with returns. It’s safety and code rolled into one.
8. Final touches
Add fascia, skirting, and a nice stair landing. Seal cedar or pressure-treated after it dries. Want lighting? Low-voltage post caps and step lights look amazing and help after dark.
Common beginner mistakes (and how to dodge them)
- Skipping flashing. Water behind the ledger rots a house rim fast. Flash it right, once.
- Mixing metals. Galvanized hangers with the wrong screws can corrode. Match ratings.
- Short footings. Frost heave will slowly lift posts. Go deep and sleep easy.
- No layout plan. Furniture needs space; stair landings need space. Plan pathways.
- Under-braced stairs. Add stringers as needed; composite treads often want more support.
- Nails where screws belong. Screws for decking, structural screws or bolts where strength matters.
It’s a lot, we know. But these little choices add up to a rock-solid deck.
What will it cost in Orem—and how long will it take?
Prices move, but here’s a realistic 2025 snapshot for DIY deck building in Orem, UT:
- Pressure-treated decking. Roughly 12–22 per square foot for materials, plus hardware and concrete.
- Cedar decking. Around 18–28 per square foot for materials.
- Composite decking. Often 28–48 per square foot for boards, hidden fasteners, and compatible fascia. Railings add a lot—budget for them.
Time-wise, a simple 12×16 low deck might be two or three weekends for a careful first-timer. Add time for inspections, rain delays, and a couple “run back to the store” moments. It happens to everyone.
Seasonal tips for Utah County builds
Spring and fall builds are comfortable, with better concrete curing conditions. Summer is fine—hydrate and start early. Winter? You can do it, but protect concrete from freezing and plan for slower cures. UV exposure is no joke here; consider a light color for composites that stays cooler underfoot.
Snowmelt needs a place to go. Keep deck boards gapped, and don’t block airflow under the deck. Your future self will thank you.
Safety and inspections: worth every minute
Wear eye protection, don’t lift beams alone, and keep a clean jobsite—tripping on cutoffs is how ankles get sprained. Respect ladders. Use a dust mask with pressure-treated lumber. If you need an inspection at foundations or framing, schedule it; inspectors are there to help you finish strong. Passing inspection feels almost as good as that first cookout.
When to call a pro (and still feel like you built it)
Some decks deserve a specialist. If you’re building:
- Second-story or roof decks. More engineering and waterproofing, more risk.
- Hillside or tricky soils. Helical piers, engineered beams, or bracing may be smart.
- Hot tubs or outdoor kitchens. That load adds up fast.
- Waterproofed spaces below. Membranes and flashing details need experience.
A hybrid approach works great: we can handle the structure and stairs, you handle decking and trim. You still save, and the bones are bombproof.
The local edge: small details we’ve learned building in Orem
A few hyper-local notes we’ve learned the hard way (so you don’t have to):
- Wind from Provo Canyon. Consider diagonal or picture-frame board layouts to control expansion and reduce cupping.
- Irrigation overspray. If sprinklers hit your deck every morning, wood ages faster. Adjust heads or add a dripline near the edge.
- South-facing scorcher. Lighter deck colors stay cooler; a pergola is a game changer here.
- Slope and drainage. Keep grade sloping away from the house. Add gravel under a low deck and weed fabric to keep things tidy.
These are the small upgrades that make a simple deck feel custom.
Ready to build—with a little backup?
If you’re excited to start but want a local set of eyes on your plan, we’ve got you. Utah County Decks helps Orem homeowners with full builds, partial builds, and straightforward design help—whatever gets you to a safe, beautiful result. We’ll talk spans, rail post blocking, deck permits in Orem, and which materials fit your budget and style. Call 801-406-3726 or click Request a Free Quote to get friendly, pressure-free help from a team that builds here, lives here, and knows what lasts on the Wasatch Front.